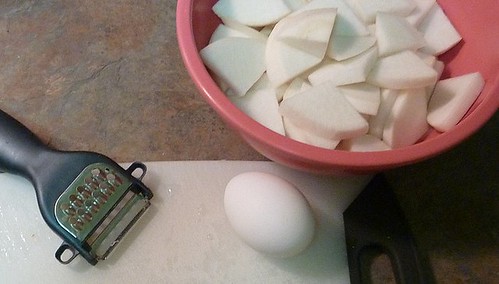
Daikon and miso make a classier soup pairing. Since I only had turnips, I decided to try out this soup with turnips to see how it would turn out. As it turned out, turnips make a great stand-in and actually produces a mildly sweeter broth. The flesh is a little denser than daikon when fully cooked. This is a simple soup that can be done in 20 minutes and doesn't require broth preparation.
Ingredients
Oil
2 turnips or 1 daikon
6 cups water
1/4 cup miso, preferably white
Cilantro, several spring (*or turnip greens)
2 eggs, beaten*
Sugar, if needed
*For a vegan option, you can leave out the egg, but use a more assertive green like turnip greens and add the greens when the turnips are halfway cooked.
1. Wash the turnips. Remove the greens if they're attached. Peel and cut into 1/4" thick slices.
2. Heat up oil in the pan, then add the turnips and let them cook over medium heat without much stirring. When the pan begins to brown add a little bit of water at a time.
3. Once the turnips are nearly fully cooked through add the rest of the water and bring to a boil.
4. Upon boiling, turn the heat to low, and stir in the miso. Turn off the heat immediately, and swirl in the egg.
5. Taste for seasoning. Add 1/2 tsp of sugar if needed. Garnish with cilantro.
 |
| (I used scallion greens here) |
With the starter successfully made, now it's time for my first rye bread. I chose to make the Alpine baguettes from Local Breads as a first recipe because while the bread uses a rye starter, the bread itself is made using wheat flour, making the dough easier to handle.
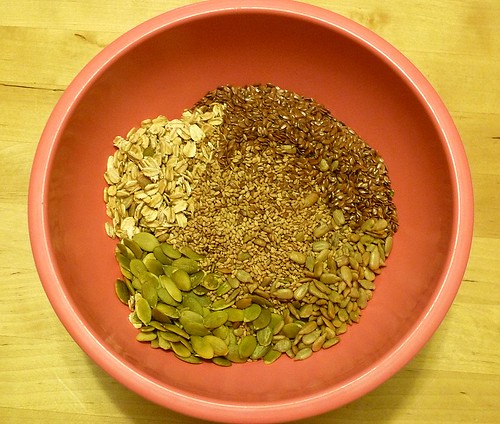
First, soak the grain and seeds the night before making the bread. This recipes calls for oats, pumpkin seeds, sunflower seeds, flax seeds, and sesame seeds.
Next time, mix together the seeds and the flour mixture. This is when dough whisk comes in handy (thanks Joedy!).
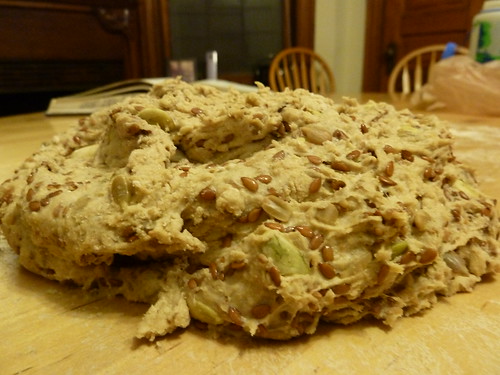
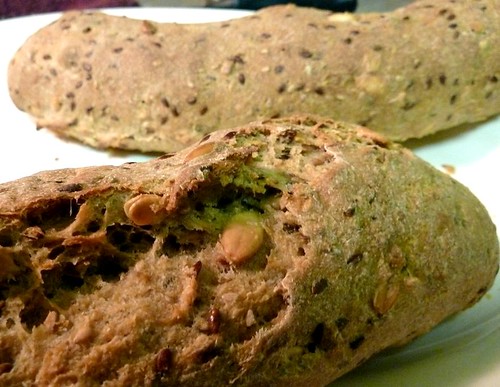
As you can see, the dough is quite sticky.
Unfortunately I got distracted while measuring flour and forgot how much I added, so I tried to play by ear. I had to add A LOT of flour to prevent the dough from gluing onto my hands. My guess was that I miscounted by 1 cup. Even after adding +1 cup of flour, this is still a fairly sticky dough to work with. Finally, I realized that the trick is to use a pair of very well-oiled hands to knead the dough.
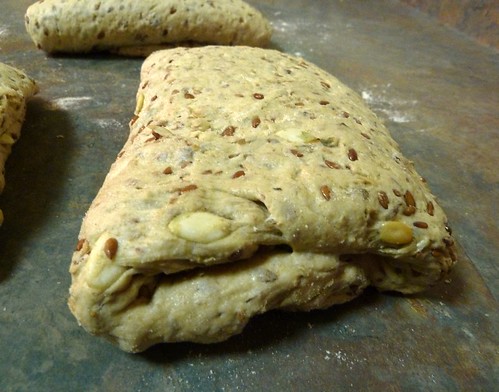
After the first rising, the dough divided into 3 pieces and each piece fold into thirds:
The dough is then rested for about an hour until it it puff up, and shaped into baguette form. It then goes into the oven for about 25 minutes. I didn't have parchment paper, so the baguette dough got somewhat misshaped when I lifted it from the counter to the baking stone.
Whole wheat grains taste better after it's been cooled down. However, I couldn't wait that long as I was hungry. When cut immediately after coming out of the oven, the inside look almost gummy:
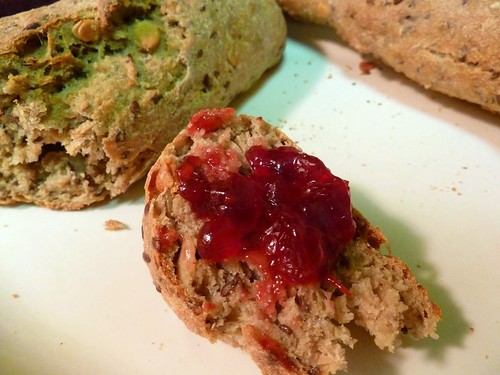
It taste really good with lingonberry preserve:
As you can see, the appearance improved next day. It looks much more bread-like.
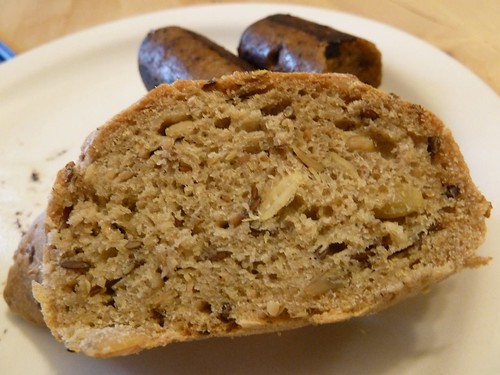
(Those are Italian veggie sausage in the background. I have to admit they are actually pretty good and the spiciness goes well with rye breads).
For a first attempt, I was happy with the way this bread turned out. It was the first time in years I had bread that somewhat resembled the bread I ate in Germany. The aroma of the bread is slightly tangy without being sour at all. The pumpkin seeds give it a nutty, earthen scent. The rye starter gave it a unique flavor that taste worlds apart from the rye one get at the supermarkets here. Despite forgetting how many cups of flours I put in and trying to eye it from there, the bread took a life of its own and was well-received by the people I shoved it to. So if people tell you that rye sourdough or German breads are hard to make, or if things don't look perfect, don't fret, just go make it. It may actually turn out fine!
Posted on 3:53 AM
|
·
edit
For some reason the Google Custom Search engine is not working. Until Blogger fixes this, you can use Google to search directly:
site:fromtarotopotato.blogspot.com KEYWORD
I apologize for the 2 week hiatus. I got involved in something that took my time away and consumed my attention - making a rye starter!
Let me first backtrack on how this started. Those of you who know me knows (and are probably tired of hearing about) how I fell in love with bread when I was in Germany. Before then, bread was fine, I liked eating sweet breads for snacks, but I thought it was a poor substitute for rice or pasta/noodle during meals. I used to know an Austrian hiker, who sniffed his nose up at American bread. I thought it was just a general European disdain for American mass-produced foods. As it turned out, he had a very good point when it comes to bread.
After I got into a baking frenzy last week, I decided to go check out the public library for bread books. I decided that I wanted to learn to bake multi-grain breads, which for me has a much more interesting texture than white breads. Skimming through the shelves, I saw a book that has been mentioned by several posters at The Fresh Loaf, Local Breads by Daniel Leader. I flipped through the pages, saw tons of Italian breads and French baguettes - white breads, and was about to put the book down, when I saw that the book had a section on German rye breads. I was sold.
Funnily, when I first started baking I was just going to learn basic sandwich bread, and at some point during decision making, I concluded that there was no reason spending time baking what I didn't enjoy eating, so decided to go for whole wheat despite the trickier dough handling. And with Leader's book triggering memory of those fond days at the German bakery, I decided to take the plunge and make rye sourdough. Not the steps most beginners would take, but I have accepted that I am a hopeless foodie.
The making of the starter was pretty easy: just some rye flour (which was actually quite some work to obtain), and water. That's it.
Day 1: mix 1/2 cup of rye flour + 1/4 cup of room temp (75F) water. At this point the thing look like clay.
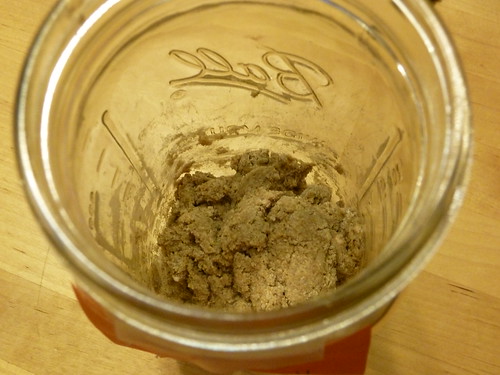
Day 2: add 1/2 cup of rye flour + 1/4 cup room temp. water. The starter is stiff but has slightly more doughy feel to it.
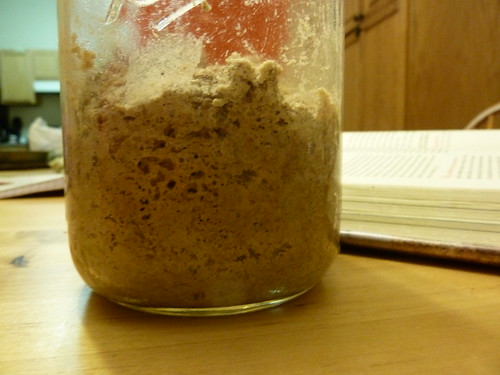
From the side you can see the bubbles indicative of fermentation:
Day 3: Add 1/2 cup of rye flour + 1/4 cup warm (90F) water. This is where I messed up - I added room temperature water as I didn't read the instructions carefully - but I didn't realize this until 2 days later. You can see that the starter becoming more doughy, and there are now bubbles as sign of fermentation. Starter is beginning to start to smell like - per Dan Leader - "rotten fall leaves and fermented apples."
Day 4: To test whether the starter is ready, I added 1/2 cup of rye flour + 1/2 cup of warm water and see if it doubles in size in 12 hours. It did not. *Belatedly realize my mistake on day 3*
Day 5: Starter still not doubled. I am thinking I've killed the starter. My roommate Jamie suggests that I move the starter to a warmer area since our apartment seems to be underheated. I moved it near the radiator.
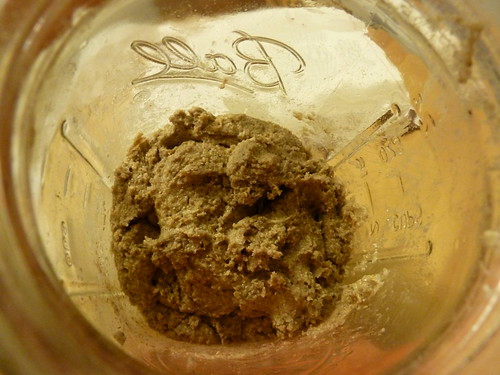
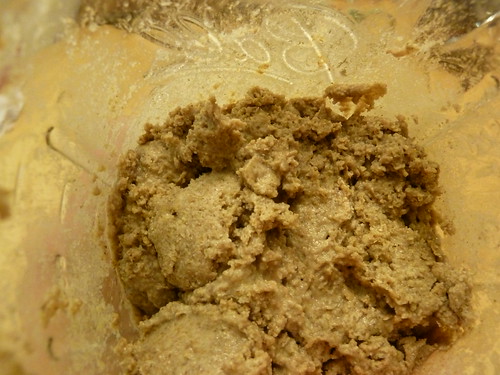
Day 6. Success!! Starter have doubled with lots of bubbles when viewed from the side. It smells just right too. I scooped out ~1/4 cup of the starter, fed it 1/2 cup of rye flour + 1/2 cup of warm water, and set it near the radiator, in preparation for my very first rye bread making.
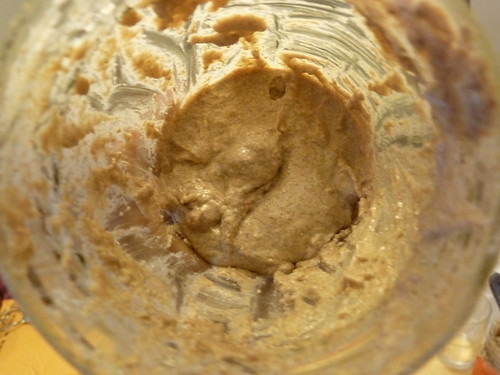
The just-refreshed starter has a more liquid appearance liquid and almost resembles batter:
While most instructions will say to discard the rest of the starter, I felt that was a waste (rye flour is expensive!), so I gave out starter to friends who wanted it. The rest, I refreshed it again, and store it in the fridge for future use. Which means that there will soon be more posts featuring sourdough starter!
Next, my very first rye bread,
alpine baguettes.